How to edit a photo with a text prompt
To edit an existing photo with AI, open image editing in the GO AI app, add your photo and describe one change. Review the result against the original before saving. A specific request such as changing hair color is easier to evaluate than “make this look better”.
This guide focuses on editing a photo you already have. Use image generation when you want a new scene from a description. Open GO AI on iPhone, iPad or Mac to follow the editing workflow.
A hair-color edit, before and after
This GO AI Studio demonstration pairs a portrait with a request to change the hair color. Compare the hair, face, clothing and background in both images. The example shows a possible result; the same wording does not guarantee an identical image.
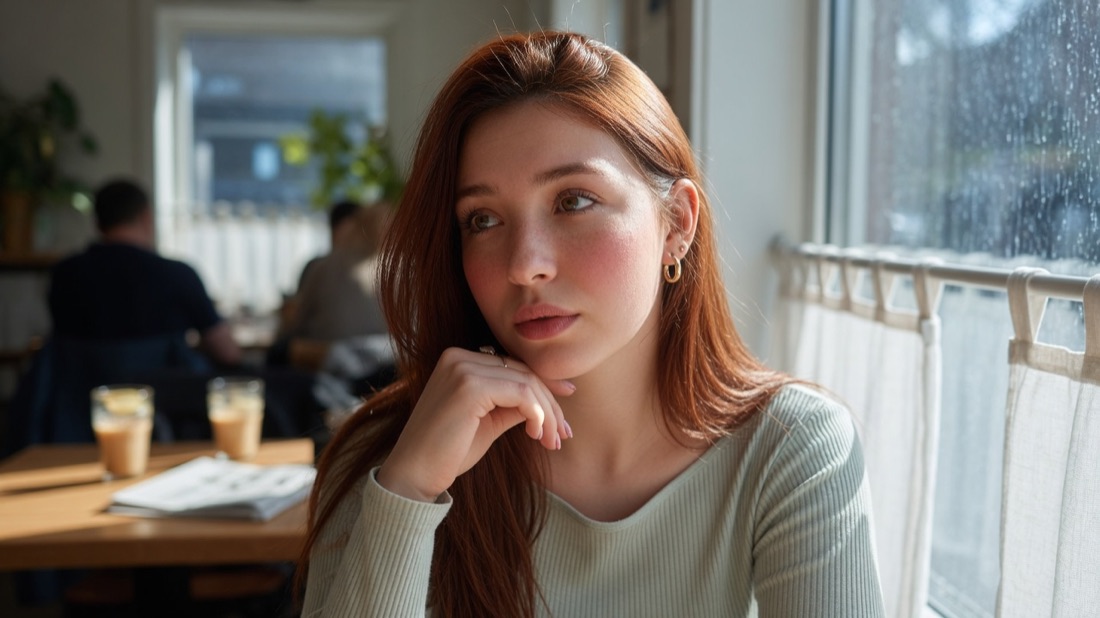
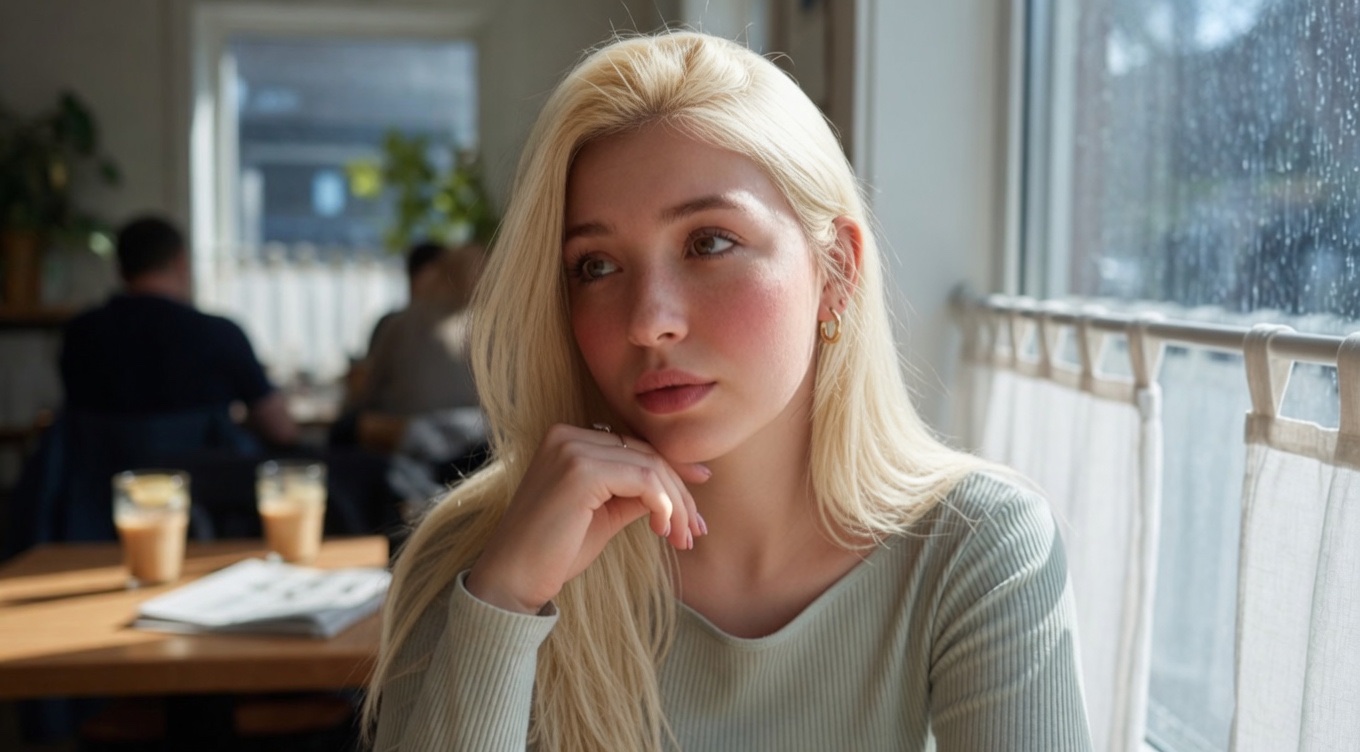
make her hair blonde
The visible edit is not a guarantee that every other pixel stays unchanged. In your own result, inspect the face and surrounding details as carefully as the requested change.
How to edit your photo with a prompt
- Start from the original. Choose a clear photo with the subject visible. Keep a separate copy so you can compare results and restart without accumulating unwanted changes.
- Open image editing in GO AI. Add the photo in the app and choose the available image-editing option. Check the current controls there; labels and available settings may change.
- Name one edit. Specify the object and the desired change: hair color, background or lighting. Say which important details you want to retain.
- Generate and compare. Check whether the intended change happened and whether anything else moved or changed. Adjust one part of the instruction for the next attempt.
- Save the version you prefer. Inspect small details at a useful zoom before sharing the result.
Plan your edit before generating
Replace the brackets with details from your photo. Save the original, your instruction and the result together so you can see which revision helped. This template is a starting point, not the prompt used for the demonstration above.
Change [one feature] to [the desired appearance]. Keep [the details that matter] as close to the original as possible.
Three prompt ideas to adapt
These are starting points for your own photos. They are not the recorded prompts behind additional demonstrated results.
Change hair color
Change the hair to a natural dark brown. Keep the hairstyle, face, clothing and background as close to the original as possible.
Adjust the lighting
Use soft, warm window light. Keep the person's features and the room layout as close to the original as possible.
Simplify a background
Replace the background with a plain light gray studio backdrop. Keep the subject's pose and clothing as close to the original as possible.
Preservation instructions communicate your goal. They do not lock the original pixels or guarantee the model will keep every detail.
How to edit a photo without changing the face
Start again from the original and ask for one change outside the face. Compare the eyes, nose, mouth, skin texture and hairline at full size. “Keep the face unchanged” is an instruction, not an identity lock. If the face changes, reject that result; repeating edits on it can carry the error forward.
Change only the background to a plain warm-gray wall. Preserve the person's face, expression, skin texture, hairline and clothing. Keep the original framing and lighting on the person.
- Choose a sharp original where the eyes and hairline are visible. Keep an untouched copy for comparison.
- Request only the background change first. If the face changes, restart from the original instead of editing the altered face again.
- Compare the eyes, mouth, jawline and skin texture at the same zoom. Keep the result only if the person still looks like the original.
Editing product photos: background, light and accurate details
Use a sharp photo of the actual item. Request a background or lighting change separately, then compare the label, logo, shape, color and texture with the original. A polished image is unusable for a listing if it misrepresents the item. If exact preservation is essential, use an editor with controlled selections rather than relying on a prompt alone.
Place the product against a plain neutral background with a soft contact shadow. Preserve its shape, material, color, label and logo. Keep the same viewing angle and proportions.
- Photograph the real item with its label readable. Record which details must stay unchanged before editing.
- Separate background, lighting and object changes into different attempts. Avoid asking for a new shape or material when you need a faithful listing photo.
- Check every letter on the label, the number of parts and the product color. Reject a polished result that changes what the buyer would receive.
What to check when an edit goes wrong
- The subject changed too much: restart from the original and narrow the request to one feature.
- The background drifted: describe the background you want to retain and inspect the next result carefully.
- Edges look wrong: look closely at hair, glasses and the border between the subject and the background.
- Text became unreadable: check signs and labels separately. Do not rely on generated lettering for an exact copy.
Questions before you begin
Can I edit the image on this article page?
Photo editing is available in the GO AI app. Open the app to add your photo and describe the change you want.
Can I repeat the same edit on another photo?
You can reuse the instruction, but the starting photo affects the result. Review each output rather than assuming the same appearance.
Should I combine several changes?
Begin with one. It is easier to see which instruction helped and which caused an unwanted change.